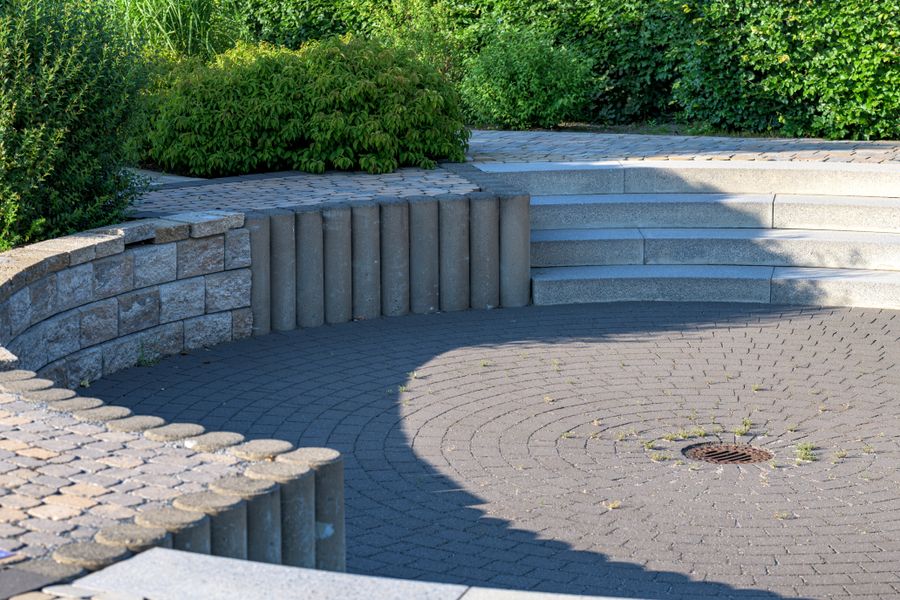
Buy a dozen 8 ft timbers and you can build a vegetable garden, a mowing edge, a few steps up the bank or a bench by the fire pit. The lumber is the same; what changes is how you set it, how much base it needs and how high you can safely go. Here is what each project takes, and where the sensible limits are.
General guidance for US homeowners. Retaining walls hold back a great deal of weight and failures are dangerous; anything holding back more than about 2 ft of soil, or near a property line, driveway or the house, should be professionally designed, and many jurisdictions require a permit for walls over about 4 ft. Call 811 before you dig. Part of the PlantMapper Landscape Timbers section.
The most popular timber project, and the one that pays off fastest · photograph via Pexels
Why timbers
The handiest thing in the lumber aisle
A 6x6 is heavy enough to stay put on its own, deep enough to hold back soil, wide enough to sit on and long enough that a few of them make a whole feature. Few landscaping materials cover that many jobs with one product.
It is also quick. A raised bed is a couple of cuts and a box of timber screws. Three steps up a bank is a Saturday. That speed is why timbers show up in so many American backyards, from suburban vegetable plots to rural lots, and why they suit people doing the work themselves.
The one place to slow down is retaining soil. Soil is far heavier than it looks, and a timber wall holding back a slope is a structure, not a garden feature. The section on low walls sets out where the sensible line is.
The classic
Raised beds
The project timbers do best. A raised bed warms up sooner in spring, drains better than heavy clay around it, keeps soil off the paths and brings the soil up to a height that is kinder to your back.
Raised bed heights and what each suits. Heights assume 6x6 timbers (5½ in actual) laid flat.
Courses
Height
Suits
Notes
One course
About 5½ in
Lettuce, herbs, strawberries, flower beds
Cheapest and quickest. Roots grow down into the ground below, so loosen it first
Two courses
About 11 in
Most vegetables, including carrots and potatoes
The sweet spot for a vegetable garden. Screw the courses together
Three courses
About 16½ in
Deep-rooted crops, easier on knees and back
Takes a lot of soil; work out the volume before you order
Four or five courses
About 22-28 in
Accessible beds you can work from a chair or without bending
Now holding back real soil. Needs proper fastening and cross-bracing on long runs
Keep the sides short, or brace them
A full 8 ft side will bow out under wet soil once you go past two courses, and frozen soil pushes harder still. Keep runs to about 6 ft or add a cross-brace or threaded rod across the middle. A bed no wider than 4 ft lets you reach the center from either side without stepping on the soil.
Set the first course on prepared ground
Level, firm and free of sod and perennial weeds. On soft ground, bed the first course on a shallow strip of compacted crushed gravel; it stops the bed settling unevenly, which is what pulls corners apart.
Lap the corners log-cabin style
On a bed two courses or taller, alternate the corner joints so each course overlaps the one below the other way. It looks better and is far stronger than stacking the joints in a line.
Leave the bottom open
Leave the bottom open to the soil so the bed drains and worms can get in. Staple hardware cloth across it if gophers, moles or voles are a problem in your area. On a patio, add a drainage layer instead. Lining the sides with heavy plastic is a reasonable precaution with treated wood; lining the bottom is not.
Price the soil before you buy the lumber
This is the cost people forget. An 8 by 4 ft bed two courses high holds roughly 1 cubic yard of soil, which is usually more than the timbers cost, especially if you buy it by the bag.
Timbers first, then soil
The free PlantMapper calculators size both halves of the job: the timber count for the frame, and the cubic feet or yards of soil and compost to fill it.
Two courses is the sweet spot for a vegetable gardenKeep beds to 4 ft wide so you can reach the middle from either sideBeds warm sooner in spring and drain better than open ground
As an Amazon Associate, PlantMapper may earn from qualifying purchases. Prices and availability are set by Amazon. Keep timber walls low, and get advice for anything over about 2 ft or holding up a path, driveway or a neighbor's yard.
The quiet one
Edging
The least exciting timber project and maybe the most useful. A timber laid along a bed gives a permanent, mower-friendly edge that does not need re-cutting every spring.
✓Where timber edging works well
Between lawn and flower bed. Set flush with the grass and the mower wheel runs right along it.
Along a gravel or mulch path. Timbers hold stone and mulch in place far better than thin plastic edging and look more substantial.
Around a tree ring or an island bed, where a simple square or rectangle looks intentional.
Holding a small step in grade of 4 to 8 inches between a path and a bed.
Rounded landscape timbers or 4x4s are usually right here; a 6x6 is more than the job needs and costs twice as much.
!Where it does not
Tight curves. Timbers are straight. Curves mean lots of short angled pieces and rarely look good; steel or aluminum edging bends.
Where the edge should disappear. A timber is a statement; metal edging hides.
Very narrow paths, where a 6 in timber on each side eats most of the width.
On a slope without stepping the runs; a straight timber on a slope leaves a wedge-shaped gap underneath.
Where people walk across it all the time; wood gets slick when wet, and a raised edge is a trip line.
Set edging so it is neither a trip hazard nor a mower killer. Where a timber meets a lawn, either sink it so the top sits flush with the soil, or raise it high enough that nobody can miss it. The awkward middle, a timber sticking up an inch above the grass, catches mower blades and toes equally well.
The rewarding one
Steps
Timbers make great backyard steps: a 6x6 or 6x8 is close to an ideal outdoor riser, heavy enough to stay put, and three or four of them turn a muddy slope into a proper route. As with any steps, the critical thing is consistency.
Every riser the same
This is the safety rule
People trip because one riser differs from the rest, not because steps are steep. Your feet calibrate to the first step and stop checking.
A 6x6 laid flat gives about a 5½ in riser and a 6x8 on edge about 7¼ in, both within the comfortable outdoor range of roughly 5 to 7 in
Measure the total rise and divide by the riser height to get a whole number of steps, then adjust the tread depth, not the risers
Include the top and bottom steps in that consistency; they are the ones people catch
Deep treads
12-16 in at the least
Outdoor steps should be more generous than indoor stairs. Shallow treads on a slope feel precarious, especially going down in the rain.
14 in or more is comfortable for a normal stride; a handy rule is two risers plus one tread equals about 26 in
Wider and shallower feels better outdoors than steep and narrow
Make the flight at least 3 ft wide, and wider on a main route
Fill and drain behind each riser
This is what keeps them stable
Each riser holds back the tread fill behind it. If that fill is loose soil, the step settles and the riser tips forward.
Compact crushed gravel behind each riser, then top it with the tread surface
Pea gravel, decomposed granite, mulch or pavers all work as treads; loose material needs the riser lip to hold it
Shed water off to the side rather than letting it run down the flight and wash out the treads
Pin them to the ground
Weight alone is not enough on a slope
A timber step that is only resting on soil will creep downhill over a few wet seasons, and frost will nudge it along in cold regions.
Drive rebar through each riser into undisturbed ground, two per step
Screw the timbers together where a step is two high
Add a handrail to any flight on a real slope; many building codes call for one at four or more risers, and it is a good idea for yard steps too
A single timber is close to an ideal outdoor riserDeep treads feel far better outdoors than steep, narrow onesSteps and seating are the two projects worth taking real care over
The satisfying one
Built-in benches
A 6x6 or 6x8 is close to bench width, which is why timber seating ends up around so many fire pits and patios. It is also the project where the choice of lumber matters most, because people sit right on it.
✓Getting it right
Use cedar, composite or new treated pine. Never creosote ties or unknown used wood on something people sit on.
A seat height of 17-18 in is comfortable: three 6x6s stacked, or a 6x8 on short legs.
Sand the top and round the edges before you fasten it. Five minutes with a sander turns a splinter trap into a bench.
Tilt the seat very slightly, a degree or two, so rain runs off rather than soaking into the grain.
Leave a small gap between seat timbers if you use more than one, so water drains and the wood dries.
Build it into a raised bed or low wall; a seat that doubles as an edge is the neatest use of all.
!What to avoid
Creosote or unknown used lumber. It bleeds tar onto clothes on warm days.
Screw heads on the seat. Fasten from below or behind, or counterbore and plug.
A bench in deep, damp shade under trees. It will be green and wet most of the year.
Overhanging a timber more than about a third of its length without support; it will sag and eventually split.
Building the bench before the patio or gravel around it; settle the finished ground level first.
Read this carefully
Low retaining walls, and where the sensible limit is
This is the timber project that goes wrong, and when it does it can be dangerous. Soil is very heavy, roughly 100 to 130 lb per cubic foot and more when soaked, so a cubic yard can weigh around a ton and a half. It pushes sideways as well as down, and in cold regions freezing water behind the wall adds more.
Timber retaining walls by height. Practical guidelines for backyards, not engineering design; soil, slope, loads above and drainage all change the answer, and local permit rules vary.
Height of soil held back
Honest view
What it needs
Up to about 1 ft
An easy backyard job
Timbers on a prepared base, rebar into undisturbed soil, gravel behind
1-2 ft
A careful DIY job
Compacted gravel base, courses screwed together, deadmen or posts, drainage stone and a perforated drain pipe
2-3 ft
Borderline, so get advice
Posts set below the frost line or deadmen tied back into the slope, full drainage. Worth having designed, or switching to segmental block
Over about 3-4 ft
Get it engineered. Not a DIY timber project
A designed wall; many jurisdictions require a permit and an engineer's plans over about 4 ft. Failures at this height cause serious injury and damage
Any height near a property line, the house, a driveway or a public sidewalk
Get professional advice
Permits, setbacks, HOA rules and liability can all apply whatever the height
Drainage behind the wall is not optional
Water trapped behind a wall adds a lot of pressure and is the most common cause of failure. Backfill at least 12 in behind the timbers with clean crushed stone, wrap it in filter fabric, run a perforated drain pipe along the bottom and take it somewhere it can drain on your own property. See Installing Landscape Timbers.
Lean it back into the slope
Step each course back slightly, about half an inch per course, so the wall works with gravity. A perfectly vertical wall that settles even a little ends up leaning out, which looks like failure even when it is not.
Tie it into the ground, not just to itself
Stacked timbers held together only by screws are one big block that can slide or tip. Posts set in concrete below the frost line, or deadmen buried back into the slope, are what actually resist the push.
Keep heavy loads off the top
A driveway, a parked car, a shed or a hot tub above a timber wall changes the load completely. If anything heavy sits on the ground above, the wall needs designing.
Terrace a slope instead of going tall
Two or three low walls stepping up a slope are stronger, safer, cheaper and better looking than one tall one, often stay under permit thresholds, and give you planting beds between them.
The honest test. If you are wondering whether your wall needs designing, it probably does. A 1 ft edge holding up a flower bed is a backyard project. Three feet of slope behind a patio with a shed above it is a structure that could hurt somebody. A couple of hours of an engineer's time costs far less than a rebuild. Our Retaining Walls section covers block and other materials for taller walls.
Low terraces are safer and better looking than one tall wallTerracing a slope gives you planting beds between the levelsA flush edge between lawn and timber keeps mowing simple
Also worth knowing
Five smaller timber projects
Quick wins that use up the offcuts from a bigger job.
A sandbox or play area border
Four timbers make a roomy sandbox in an afternoon. Use new, smooth lumber (cedar or
composite if you want to be most cautious), sand the top edges and round them off,
because kids sit and kneel on them. Never use old railroad ties anywhere children
play.
A trash can or firewood pad
Two timbers laid on gravel lift trash cans or a firewood rack off wet ground, so
the bottoms do not rot and air can move. Keep firewood stacks away from the house to
avoid inviting termites. Cheap, quick and useful.
Stepping timbers across gravel or lawn
Short offcuts, about 18 to 24 in long, set flush into gravel or grass make a
handsome informal path. Bed them on compacted gravel so they do not sink, and space
them to a comfortable stride.
A raised pond surround
Timbers make a good frame around a raised pond liner or a preformed pond. Keep the
wood clear of the water itself, and use cedar or composite if there is any chance of
contact; copper-treated lumber and fish do not mix.
A compost bin
Three sides of timbers, open at the front, with removable boards slid between
posts. Solid, tidy, and it will outlast several plastic bins. Line it with hardware cloth
if rats are a problem. See Composting.
Numbers
How many timbers a project takes
Rough counts for the most common projects, based on 8 ft timbers. Always add 10 percent for cuts.
Timber counts for typical projects. Assumes 8 ft 6x6 timbers unless stated.
Project
Timbers needed
Notes
Raised bed 8 × 4 ft, one course
3
Two full lengths for the sides, one cut in half for the ends
Raised bed 8 × 4 ft, two courses
6
Lap the corner joints
Raised bed 4 × 4 ft, two courses
4
Two timbers cut in half, twice
Edging, 32 ft run
4 (rounded timbers or 4x4s)
Lighter timbers are usually plenty and much easier to handle
Three backyard steps, 4 ft wide
2-3
One 4 ft riser per step (two from each timber), plus rebar; more if risers are doubled
Bench 6 ft long
3-4
One or two for the seat, offcuts for the legs
Low wall 16 ft long, two courses
4 plus posts or deadmen
Two courses of two timbers, plus posts or deadmen and drainage stone
Compost bin 4 × 4 ft, three courses
5-6
Plus posts and removable front boards
Check the count before you buy
Enter your dimensions and the free PlantMapper landscape timbers calculator gives you the number of timbers and the total length, with an allowance for cuts.
Three feet of retained soil is tons of weight pushing sideways, and a timber wall that fails tends to go suddenly.
The fixTerrace the slope into two or three low walls, or get anything over about 2 ft designed.
2. No drainage behind a wall
Water building up behind the wood adds pressure, heaves in winter and rots the timbers from the back where you cannot see it.
The fixDrainage stone and a perforated drain pipe, run out to somewhere it can discharge.
3. Long unbraced bed sides
An 8 ft run of timbers two or three courses high will bow out under wet soil within a couple of seasons.
The fixKeep runs to about 6 ft, or add a cross-brace or threaded rod across the middle.
4. Beds too wide to reach across
A bed wider than about 4 ft means stepping onto the soil to weed the middle, which compacts it and defeats the point.
The fixKeep beds to 4 ft wide if you can reach from both sides, 2 ft if only from one.
5. Uneven step risers
One step off by three-quarters of an inch is exactly what catches a foot, and yard steps get used in the dark and the rain.
The fixMeasure the total rise, split it into equal risers, and adjust the tread depth instead.
6. Forgetting the cost of filling the bed
The soil to fill a three-course raised bed usually costs more than the timbers around it.
The fixWork out the volume first, buy in bulk by the cubic yard, and consider filling the bottom third with logs, branches and leaves (a hugelkultur-style base).
How tall can a landscape timber retaining wall be?
As a practical guide for a backyard: up to about 1 ft is simple; 1 to 2 ft needs a compacted gravel base, courses screwed together, deadmen or posts and real drainage behind; 2 to 3 ft is borderline and worth having designed; and many jurisdictions require a permit and an engineered design for walls over about 4 ft, or lower if there is a driveway, slope or building above. For anything over about 3 ft, segmental concrete block or an engineered wall is usually a better choice than timber. Walls near a property line or the house should get professional advice at any height.
How many landscape timbers do I need for a raised bed?
Using 8 ft timbers, an 8 by 4 ft bed one course high takes three: two full lengths for the long sides and one cut in half for the ends. Two courses take six. A 4 by 4 ft bed two courses high takes four. Add about 10 percent for cuts and round up to whole timbers.
How deep should a raised bed be for vegetables?
About 11 to 12 inches, which is two courses of 6x6 timbers, suits nearly every vegetable including carrots and potatoes and is the most popular height. One course is fine for lettuce and herbs if you loosen the soil underneath so roots can go deeper. Three or more courses gives a comfortable working height but takes a lot of soil to fill.
Should I line a timber raised bed?
Never line the bottom: leave it open so the bed drains and worms can move in and out. Hardware cloth across the bottom is fine where gophers or voles are a problem. Lining the inside faces with heavy plastic is a reasonable precaution if you use pressure-treated wood for food, and it slows weathering. Staple it below the top edge so it does not show, and leave the bottom edge loose.
How tall should landscape timber steps be?
A 6x6 laid flat gives about a 5 1/2 inch riser, and a 6x8 on edge about 7 1/4 inches, both inside the comfortable outdoor range of roughly 5 to 7 inches. What matters more than the exact number is that every riser in the flight is the same height, because that is what stops people tripping. Measure the total rise, divide it into equal risers, and adjust the tread depth to the slope.
Can I edge a lawn with landscape timbers?
Yes, and it makes a good permanent mowing edge. Set the timber so its top is flush with the grass and the mower wheel can run along it, which cuts out most string-trimming. Avoid leaving it an inch or so above the lawn, where it catches mower blades and toes. Lighter rounded landscape timbers or 4x4s are usually plenty for this job.
Can I build a bench from landscape timbers?
Yes; a 6x6 or 6x8 is close to bench width already, and stacked or set on short legs it reaches a comfortable 17 to 18 inch seat height. Use cedar, composite or new treated pine, never creosote railroad ties, which bleed tar onto clothes. Sand the top and round the edges, slope the seat slightly so rain runs off, and screw from below so no screw heads show.
Are landscape timbers safe for a sandbox or play area?
New, smooth timbers are fine and make a roomy sandbox quickly. Cedar or composite are the most cautious choices, and new treated pine is widely used. Sand and round the top edges because kids sit and kneel on them. Do not use old railroad ties anywhere children play: creosote ties are not recommended for play areas, and they bleed tar on hot days.