Three things decide whether a landscape light is any good: how it is powered, how well it handles water, and what the light itself looks like. Get the wet rating wrong and it dies in its first winter; get the color temperature wrong and the whole yard looks like a gas station.
General advice for American homeowners. Any new outdoor outlet, circuit or hardwired 120V fixture should be installed by a licensed electrician, usually with a permit and inspection under your local code, and every fixture should be listed for the wet or damp location it actually sits in. Part of the PlantMapper Landscape Lighting section.
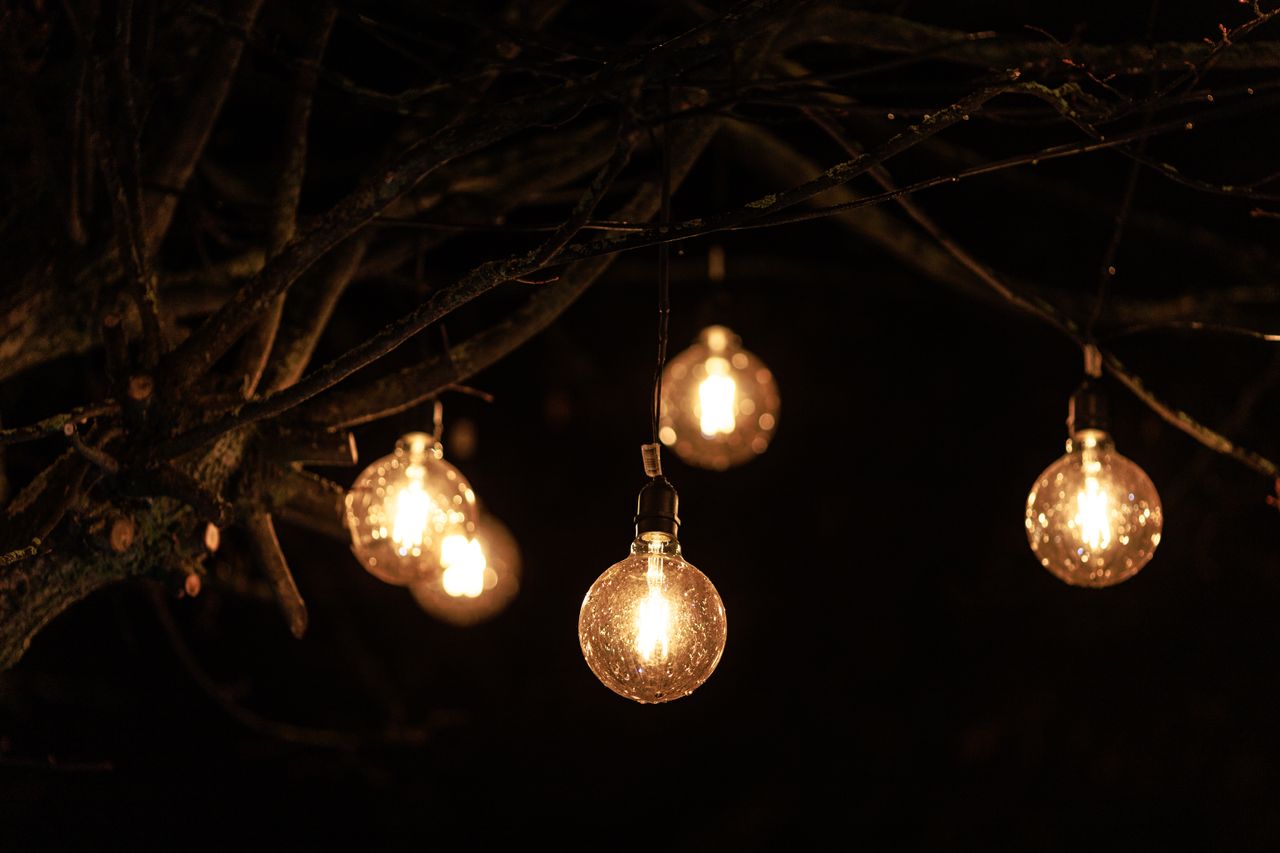
The right fixture, warm light and the right wet rating · photograph via Pexels
How to choose
Four questions, in this order
How will it be powered? This is the first decision and it shapes everything else. 120V line voltage gives the most freedom and needs a licensed electrician. 12V low voltage plugs into a GFCI outdoor outlet and is the sensible middle ground for most yards. Solar needs nothing at all and gives correspondingly less light.
Where exactly will it sit? Under a covered porch, out in the open, at ground level where it sits in water after every storm, or actually underwater? That decides the wet rating you need, and it is the spec most often ignored.
What kind of light do you want? Warm white at low output for nearly everything. Getting the color temperature and brightness right matters far more than the style of the fixture.
How long do you want it to last? Solid brass, copper and stainless fixtures are still working in fifteen years. Cheap painted aluminum and plastic stake lights are often dead in three.
The first decision
12V low voltage, 120V or solar
These three are genuinely different products with different capabilities, costs and safety rules. Most yards end up with a mix.
12V low-voltage, 120V line-voltage and solar landscape lighting compared.
Line voltage (120V)
Low voltage (12V)
Solar
How it works
A dedicated outdoor circuit from the breaker panel
A transformer plugged into a GFCI outdoor outlet, feeding low-voltage wire
A small solar panel and rechargeable battery in each fixture
Who installs it
A licensed electrician, usually with a permit and inspection
DIY, plugged into a GFCI outlet an electrician has installed
Anyone
Brightness
Highest, with no practical limit
Good; plenty for residential landscape lighting
Lowest, and varies with the weather and season
Wire
Code-approved cable or conduit, buried at the depth your local code requires
Low-voltage direct-burial wire, laid a few inches down or under mulch
None
Flexibility
Fixed once installed
Excellent: move and add fixtures freely
Total: pick it up and move it
Reliability
Excellent
Excellent
Poor to fair; weakest in winter and in shade
Running cost
Low with LED
Very low
Zero
Typical life
15 to 25 years
10 to 20 years for quality fixtures
2 to 5 years; batteries fail first
Best for
Permanent systems, long runs, wall lanterns, pools and fountains
Nearly every residential backyard
Renters, temporary effects, spots with no power
✓Why 12V suits most yards
Safe to install and expand yourself, once an electrician has added a GFCI outdoor outlet with an in-use cover.
The wire only needs shallow burial, a few inches down or under mulch, instead of code-depth trenching and conduit.
You can move a fixture, add one or change the aim in five minutes, which is exactly what a new system needs in its first year.
Quality is now genuinely good: solid brass, copper and stainless fixtures with proper optics.
Plug-in and quick-connect wire systems make adding to a run simple.
The transformer must be sized in watts for the total load, and there are practical limits on run length before voltage drop dims the far end.
!When 120V is the right answer
Wall lanterns, porch and entry lights, and anything mounted on the house.
Very long runs where 12V would suffer voltage drop.
High-output fixtures, and anything that has to be genuinely bright, such as security floodlights.
In-ground lights set into concrete, pavers or steps as part of a build (though 12V versions exist too).
Anything for a pool, spa, pond or fountain, where the code is stricter.
A permanent designed system where the wire route can be planned into the landscaping.
The single most useful thing to have an electrician install for landscape lighting is a GFCI-protected outdoor outlet with a weatherproof in-use cover, in a sensible spot near where the transformer will hang. It often costs a few hundred dollars, it lets you plug in a 12V transformer, string lights, a leaf blower and holiday lights, and it turns landscape lighting from an electrical project into a plug-it-in-and-arrange-it one.
What to buy
The fixture types, and what each one is for
A handful of fixture types cover nearly every yard. Choosing the right type for the job matters more than the brand.
Spotlights and uplights
The workhorse of landscape lighting. A small directional fixture on a ground stake, aimed up into a tree, a shrub, a wall or a pergola post.
Cheap, movable, and the reason 12V systems are so useful: you can reposition them until it looks right.
Choose an adjustable head, a narrow beam (around 15 to 25 degrees) for trees and a wider flood for walls.
Look for a recessed bulb, a hood or a glare guard. This is the fixture most likely to shine in someone's eyes.
Stakes work loose and get knocked by mowers, dogs and frost heave, so check the aim twice a year.
Solid brass or stainless will outlast painted aluminum several times over, especially near salt air.
Ground-level fixtures sit in puddles and leaf litter, so buy wet-listed fixtures with a high rating. See wet ratings.
Wall lanterns, post lights and path lights
Lights that wash an area rather than an object, and the mainstay of front entries, decks, patios and walkways.
Wall lanterns and deck lights: mount them below eye level where people sit, and choose downward-only or shielded designs. An unshielded lantern at head height is pure glare.
One on each side of the front door, or one to the side, is nearly always enough at an entry.
Path lights: 18 to 30 in posts or "mushroom" and "hat" style lights that throw light down and out. Excellent along walkways and driveways, and far better than tall lamp posts.
Choose path lights with a shielded or louvered top, so you see the pool of light rather than the bulb.
Wall lanterns and lamp posts are usually 120V and an electrician's job; path lights are usually 12V.
Avoid clear-glass carriage lanterns that glow on all sides. They light the sky and the neighbors far more than the ground, and dark-sky friendly versions are easy to find.
Well lights, deck lights and step lights
Fixtures set flush into the ground, paving, deck boards, walls or step risers. The neatest option there is, and far easier to install while you build than afterward.
Step and riser lights set into each riser, or a low side light every step or two, are the safest way to light a flight of deck or porch stairs.
In-ground well lights are excellent for uplighting a wall or a tree without a visible fixture, but they sit in water and get walked on. Buy them listed for in-ground wet use and rated for foot or vehicle traffic as needed.
Deck post-cap and rail lights are cheap and effective, and 12V versions are simple to add while the deck is being built.
Plan them at the building stage. Adding a recessed light to a finished patio means cutting into it.
Keep the output low: recessed lights are close to the eye and glare easily.
They need cleaning more often than anything else, because leaves and dirt collect in the well.
String lights
The cheapest transformation in landscape lighting, and often the most effective. Warm bulbs strung over a deck or patio do more for the mood than anything else on this page.
Use string lights rated for outdoor (wet) use, with shatterproof bulbs, not indoor holiday lights.
Hang the run on a stainless guide wire rather than letting it hang from its own cord, which stretches and eventually fails.
Warm white, around 2200 to 2700K. Cool white string lights look wrong immediately.
Zigzag them across a patio, or run them along a pergola, a deck rail or a fence line. See the Pergolas section.
Put them on a timer or outdoor smart plug so they come on at dusk and off at a sensible hour.
Solar and battery string lights are fine for occasional use; plug-in sets are far more reliable if you have a GFCI outlet.
Solar, portable and specialty fixtures
Solar stake lights: no wiring at all, and quality varies enormously. Good ones with a decent panel and a replaceable battery are useful; the cheapest are dim by fall and dead within two years.
Solar needs direct sun on the panel for several hours. A shady yard, or a northern winter, is exactly where solar performs worst.
Rechargeable portable lamps have come a long way and are excellent on a table: USB-charged, dimmable, warm and movable.
Underwater fixtures for ponds and fountains are a special case. See lighting near water.
Downlights mounted in trees ("moonlighting") give the most natural look of all, but need a safe wire route up the tree and a way to reach them for upkeep.
Candles and lanterns are still the best mood lighting ever invented, and use no power at all.
As an Amazon Associate, PlantMapper may earn from qualifying purchases. Prices and availability are set by Amazon. Buy on lumens and beam spread rather than watts, stick to warm white in the 2200 to 2700K range, and choose fixtures listed for the wet or damp location they will actually sit in.
The two numbers that matter
Lumens, beam spread and color temperature
Wattage tells you almost nothing useful about an LED fixture. Lumens, beam spread and color temperature tell you everything.
Rough guidance for output and color in a residential yard. Less is nearly always more.
Application
Typical output
Beam angle
Color temperature
Path and step lights
20 to 80 lumens
Wide or downward
2200 to 2700K
Path lights along a walkway
80 to 200 lumens
Wide, shielded
2700K
Wall lights at a door or on a deck
100 to 300 lumens
Down or up-and-down
2700K
Uplighting a small shrub or feature
80 to 200 lumens
Narrow, 15 to 25°
2700K
Uplighting a small tree
200 to 400 lumens per fixture
Narrow, 15 to 25°
2700K
Uplighting a large tree
400 to 700 lumens per fixture, two fixtures
Narrow, 10 to 15°
2700 to 3000K
Grazing a textured wall
150 to 400 lumens
Narrow, close to the wall
2700K
String lights over a patio
15 to 40 lumens per bulb
Omnidirectional
2200 to 2700K
Motion-sensor security light
800 to 1,500 lumens
Wide but shielded
2700 to 3000K
✓Getting the light right
Warm white, 2200 to 2700K, for essentially all landscape lighting. It flatters foliage, stone and brick, feels relaxed, and is what dark-sky groups recommend.
Keep the color temperature the same across the yard. Mixed warm and cool fixtures are obvious after dark.
Choose the lowest output that does the job. Eyes adjust to the dark, and most landscape fixtures are far brighter than they need to be.
Narrow beams for objects, wide beams for surfaces. A 15° spot on a tree, a wide flood on a wall.
Dimmable fixtures, or a dimmable transformer, make a big difference to how much the lighting gets used.
A CRI of 80 or better makes plants look like themselves rather than gray.
!What goes wrong
Cool white or "daylight" fixtures, which look commercial outdoors and turn plants gray.
Too much output, which creates glare and black shadows right outside the beam.
A wide flood used to light a tree, which lights the sky and the neighbors too.
Buying on watts rather than lumens. LED wattage tells you about power use, not brightness.
Mixing color temperatures between fixtures bought at different times.
Very cheap LEDs, whose color shifts noticeably within a couple of years.
The spec people skip
Choosing the right wet rating
In the US the key mark is a UL or ETL listing for wet locations (out in the open) or damp locations (under a roof or covered porch only). Many landscape fixtures also carry an IP (Ingress Protection) rating: the first digit is protection against dust, the second against water, and the second is the one that decides whether a fixture survives years of storms, sprinklers and snowmelt.
IP ratings and where each belongs in a yard, alongside UL/ETL wet and damp listings.
Rating
Protection against water
Where it belongs
IP20
None
Indoor only. Never outdoors, however sheltered
IP44
Splashing from any direction
Only under a covered porch or deep roof overhang (damp location)
IP54
Splashing, plus dust protected
Covered wall lights in protected spots
IP65
Low-pressure water jets from any direction
The sensible default in the open (with a wet-location listing): wall lights, path lights, string lights, exposed fixtures
IP66
Powerful water jets
Exposed and coastal spots, near sprinkler heads, anywhere power-washed
IP67
Temporary immersion up to about 3 ft
In-ground well lights, spotlights that sit in puddles, deck lights
IP68
Continuous immersion, to a stated depth
Underwater pond and fountain fixtures, listed for submersion. Check the stated depth
IK rating (separate)
Impact resistance
Worth checking for anything walked on or driven over
✓Rules of thumb that work
A wet-location listing, and IP65 or better, is the sensible minimum for any fixture out in the open.
IP67 for anything at ground level. Spotlights, deck lights and in-ground lights all end up sitting in water.
IP68 and a submersible listing for anything underwater, and check the rated depth, not just the number.
Damp-location or IP44 fixtures belong only under a real roof, and a wet-rated fixture costs little more.
Coastal yards need better materials as well as ratings, because salt air is harder on fixtures than rain.
The rating covers the whole assembly, including the wire entry and splices. A wet-rated fixture on a badly made splice is not protected.
!Where people get caught out
Using indoor or damp-only string lights out in the open, which fail in the first big storm.
A low-rated spotlight sitting in a bed that floods every spring.
In-ground lights bought without checking they are rated for water and for being walked or driven on.
Splices left unprotected while the fixtures themselves are highly rated.
Assuming "outdoor" on the box means suitable for that exact spot.
Anything for a pool, spa, pond or fountain chosen without a licensed electrician. These have their own code requirements.
Telling good from bad
Judging quality
Landscape lights live outdoors, in the wet, year round. The difference between a good one and a cheap one shows up in year three, not year one.
Materials
What lasts outdoors
The body material is the best single clue to how long a fixture will survive outdoors.
Solid cast brass weathers to a soft bronze and lasts for decades. The best choice for spotlights and ground-level fixtures.
316 stainless steel is excellent, including on the coast. 304 is fine inland but pits near salt water.
Copper weathers to a handsome patina and lasts.
Powder-coated aluminum is fine at a mid price, but corrodes at chips and cut edges, especially near the coast or where de-icing salt splashes.
Plastic and painted steel are the cheap options and often last two to three winters.
Construction
Details that matter
A few construction details separate fixtures that last from fixtures that fill with water.
A sealed, gasketed wire entry rather than a hole with a rubber grommet.
Tempered glass lenses, not acrylic, which yellows and crazes in the sun.
Replaceable LED bulbs (MR16 or similar) where possible. A sealed integrated LED means the whole fixture is disposable.
Stainless hardware and adjusting screws, which are the first thing to seize.
A real gasket and a lens held in mechanically.
The light itself
Optics and consistency
Two fixtures with the same lumen figure can look completely different, and the difference is in the optics.
A proper reflector or lens gives a clean beam; a bare LED behind flat glass gives glare.
A recessed bulb, hood or honeycomb louver controls glare and is worth paying for.
CRI 80 or better so plants look like themselves.
Consistent color between fixtures in the same line. Cheap LEDs vary noticeably from one to the next.
What it costs over time
The real comparison
A cheap fixture replaced three times costs more than a good one bought once, and means digging up the bed three times.
A $20 stake light lasting three years costs more per year than a $100 brass one lasting fifteen, and the brass one looks better the whole time.
Warranties on quality landscape fixtures often run ten years or more, some lifetime; on cheap ones, one year.
Look for a line you can add to in five years, so the system can grow.
Buy fewer, better fixtures. Nearly every good landscape lighting plan uses fewer lights than the homeowner first imagined.
Running it
Energy use and running cost
Modern LED landscape lighting is remarkably cheap to run, and controls matter far more to the electric bill than the fixtures do.
Rough running costs, assuming about 17 cents per kWh (near the recent US average; rates vary a lot by state and utility, so check your bill).
Scheme
Typical load
Hours per night
Rough annual cost
Six 12V LED spotlights
about 18 W
4 hours
about $4 a year
String lights over a patio
about 25 W
4 hours
about $6 a year
Two wall lanterns on a photocell
about 16 W
10 hours
about $10 a year
A full LED backyard system
about 80 W
4 hours
about $20 a year
One 30 W floodlight left on all night
30 W
12 hours
about $22 a year
The same floodlight on a motion sensor
30 W
a few minutes a night
Pennies
The comparison worth noticing is the last two rows: a single floodlight left on all night costs more to run than a whole well-planned LED backyard system, and does far less for the yard. Timers, photocells and motion sensors are the cheapest energy savings available, and they make the lighting better too.
Making the decision
Which system suits your yard
Match the row to your situation, not to the display at the home improvement store.
Choosing a landscape lighting system by situation.
If this is you
Choose
Why
First system, want flexibility, have or can get a GFCI outdoor outlet
Safe to install and expand yourself, and you can move fixtures until it looks right
No outdoor power, or renting
Solar and rechargeable portable lamps
No installation at all; accept less, and less dependable, light
Wall lanterns, porch lights, anything on the house
120V, installed by a licensed electrician
Fixtures hardwired to the house are line-voltage work and usually need a permit
Lighting a pool, spa, pond or fountain
Installed by a licensed electrician, with fixtures listed for submersion where needed
Water has its own electrical code rules. Not a DIY situation
A deck or patio that needs atmosphere tonight
Outdoor-rated plug-in string lights on a guide wire
The cheapest transformation there is, and it plugs into a GFCI outlet
Recessed lights in pavers, a deck or steps
Plan them into the build; 12V deck and step lights, in-ground well lights
Adding them later means cutting into the finished surface
Big lot, fixtures far from the house
120V by an electrician, or several 12V runs or a second transformer
Voltage drop dims the far end of a long 12V run
Coastal yard
Solid brass, copper or 316 stainless, IP66 or better
Salt air destroys painted aluminum and lower-grade stainless
You want it to look good in fifteen years
Solid brass, copper or 316 stainless, from a line you can add to
Cheap fixtures are dead in three winters and product lines get discontinued
Avoid these
Six buying mistakes
Each of these is decided at the ordering stage, and each one shows up within a couple of winters.
1. Underrating for water
A damp-rated or low-IP fixture at ground level in a bed that floods every spring will fill with water and fail, and so will indoor string lights hung across a patio.
The fixWet-location listed and IP65 or better in the open, IP67 for anything at ground level or walked on, and submersible-listed IP68 with a stated depth for anything underwater. Protect the splices to the same standard as the fixtures.
2. Buying cool white
Blue-white light makes a yard look like a gas station, turns plants gray, scatters more into the night sky and disturbs insects and bats more than warm light does.
The fixBuy warm white at 2200 to 2700K throughout, and keep the color temperature the same on every fixture in the yard.
3. Choosing on watts instead of lumens
LED wattage tells you how much power a fixture uses, not how much light it gives, and the relationship varies enormously between products.
The fixBuy on lumens and beam spread. A 3 W fixture with good optics and a narrow beam will light a tree better than a 10 W one with a bare LED behind flat glass.
4. Cheap plastic and painted stake lights
They look identical to good ones on day one, and by the third winter the paint has flaked, the lens has crazed, water is inside and the adjusting screws have seized.
The fixBuy solid brass, copper or stainless for anything at ground level. Fewer, better fixtures beat more, cheaper ones on looks and on cost over ten years.
5. Expecting too much from solar
Solar lights need several hours of direct sun on the panel, which a shady yard does not get, and they are dimmest in winter, when nights are longest and you most want light.
The fixUse solar for temporary effects, rentals and spots with no power at all. For a system you rely on, use 12V from a GFCI outdoor outlet.
6. Undersizing or overloading the transformer
A 12V transformer that is too small for the total watts, or a wire run far longer than it should be, gives dim, flickering fixtures at the far end and shortens the transformer’s life.
The fixAdd up the watts of every fixture and load the transformer to no more than about 80% of its rating, follow the run-length chart for your wire gauge, and split a big yard into more than one run.
Print it or check it off as you go
The buying checklist
Twelve things to confirm before you order. Your checks are saved in this browser only.
Power
Specification
Quality
Questions
Landscape light fixtures and power: your questions answered
Answers to the questions homeowners ask most.
Should I use 12V low-voltage, 120V or solar landscape lighting?
12V low voltage suits most yards: it is safe to install and expand yourself once an electrician has added a GFCI outdoor outlet, the wire only needs shallow burial, and you can move fixtures until it looks right. 120V line voltage is the answer for wall lanterns and porch lights, very long runs, high output, lights built into hardscape, and anything for a pool or fountain, and it should be installed by a licensed electrician, usually with a permit. Solar needs no wiring at all and gives correspondingly less light: useful for renters, temporary effects and spots with no power.
What rating do outdoor light fixtures need?
For anything out in the open, look for a UL or ETL listing for wet locations; damp-location fixtures belong only under a covered porch or roof. Many landscape fixtures also show an IP rating: IP65 is a sensible minimum in the open, IP67 for anything at ground level such as spotlights, deck lights and in-ground well lights, and IP68 with a stated depth, plus a submersible listing, for anything in a pond or fountain. IP20 is indoor only. The rating covers the whole assembly, so a wet-rated fixture on a badly made splice is not protected.
What color temperature should landscape lights be?
Warm white, around 2200 to 2700K, for essentially all landscape lighting. It flatters foliage, brick and stone, feels relaxed rather than commercial, puts less blue light into the night sky, which is what dark-sky groups recommend, and disturbs insects and bats less than cooler light. Cool white and "daylight" fixtures make a yard look like a gas station and turn plants gray. Just as important, keep the color temperature the same across the whole yard, because mixed warm and cool fixtures are obvious after dark.
How many lumens do landscape lights need?
Far fewer than most people expect, because eyes adjust to the dark. As rough guidance: 20 to 80 lumens for path and step lights, 80 to 200 for path lights along a walk and small shrubs, 100 to 300 for a wall light at a door, 200 to 400 per fixture for a small tree and 400 to 700 for a large one using two fixtures, and only 15 to 40 lumens per string-light bulb. Buy on lumens and beam spread rather than watts, with narrow beams for objects and wide floods for surfaces.
Are solar landscape lights any good?
They have improved, and good ones with a decent panel and a replaceable battery are genuinely useful, but they have real limits. They need several hours of direct sun on the panel, which a shady yard does not get, and they are dimmest in winter when nights are longest. The cheapest are dim by fall and dead within two years, because the battery fails first. Use solar for temporary effects, rentals and spots with no power; use 12V low voltage for lighting you actually rely on.
What is the best material for landscape light fixtures?
Solid cast brass, which weathers to a soft bronze and lasts for decades, or 316 stainless steel, which is excellent even on the coast. Copper also weathers beautifully. Powder-coated aluminum is acceptable at a mid price but corrodes at chips and cut edges, and plastic or painted steel often lasts two or three winters. Check the details too: a glass rather than acrylic lens, a sealed wire entry, stainless hardware, and a replaceable LED bulb rather than a sealed disposable unit.
How much does landscape lighting cost to run?
Very little with LED. At about 17 cents per kWh, six 12V LED spotlights on four hours a night cost roughly $4 a year, a set of string lights about $6, and a full LED backyard system around $20. The comparison worth noticing is that a single 30 W floodlight left on all night costs more than that whole system, and does far less for the yard. Rates vary a lot by state, but timers, photocells and motion sensors are the cheapest savings available everywhere, and they make the lighting better too.
Can I install low-voltage landscape lighting myself?
Generally yes, which is the main reason it suits most yards: the transformer plugs into a GFCI outdoor outlet, and the 12V wire and fixtures can be installed and moved without an electrician. What you should not do yourself is the 120V side: the outdoor outlet, any new circuit and any hardwired fixture should be installed by a licensed electrician, usually with a permit. Size the transformer in watts with headroom, keep wire runs within the chart for the gauge, call 811 before digging, and protect every splice to the same standard as the fixtures.