

The usual mistake: too little care, then too much force
A lot of patios follow the same pattern. Nobody touches them for a few seasons, they turn green and grimy, and then one Saturday someone rents a gas power washer and goes over them with the narrowest tip. It looks great for a week. It has also blasted the sand out of every joint, scarred the surface of the concrete, and left a rougher texture that holds dirt and algae even better next year.
The better approach is less work overall. Sweep or blow the patio off often enough that dirt never settles in, wash it properly in spring and fall, check the joints once a year and wipe up spills from the grill or the dinner table while they are fresh. Done that way, a patio looks good all the time rather than for a couple of weeks after each big clean-up.
This guide walks through that routine, the cleaners worth buying and the ones to skip, how climate changes the job from Florida to Minnesota, and the specific needs of each material, because porcelain and travertine want almost opposite treatment. If something is sinking, cracking or heaving rather than just dirty, Patio Problems is the better place to start.
What a patio really needs from you
If you only remember one part of this page, make it this.
Every couple of weeksFive minutes
- Sweep or blow it off - the cheapest maintenance you will ever do
- Shift chairs and planters now and then so nothing stays wet underneath
- Clean up spills right away, above all grease near the grill
Spring and fallAn hour or two
- Wash it down with the hose, a cleaner and a stiff push broom
- Treat algae wherever it has started to take hold
- Clear trench drain grates, catch basins and downspout outlets
Every year or twoHalf a day
- Look along every joint and refill any that have washed low
- Top up polymeric sand on paver and flagstone patios
- Walk the whole surface and note anything that rocks, sinks or has heaved
Every few yearsA weekend
- Deep clean with a paver or concrete cleaner if it has gone dull
- Reseal if the patio was sealed and water no longer beads up
- Swap out any paver that has cracked or picked up a stain that will not shift
Sweeping: the maintenance nobody brags about
Weeds in the joints, moss, algae and most stains start the same way: leaves, pollen and dirt sitting on the surface long enough to rot down. Regular sweeping breaks that chain before it starts.
- A stiff push broom suits most surfaces. On polished or very smooth porcelain, switch to a softer broom so you do not leave fine scratches.
- Sweep along the joints as well as across the pavers. The joints are where the debris that feeds weeds settles.
- Fall is the season that matters. Leaves left lying through a wet winter cause dark tannin stains and give moss a foothold in the joints.
- A leaf blower on low is quick on big patios and kinder to joint sand than a broom.
- Brush grit off, not in. On pavers, sweep debris off the surface rather than working it down into the joints.
- Clear under the furniture as well. The shady, damp patch under a table is where algae gets going first.
- Pollen season counts. In the South the yellow pine pollen of early spring stains pale pavers if it is left to get wet and sit; a quick rinse or blow-off keeps it from setting in.
How to wash a patio properly
A hose, a broom, the right cleaner and some patience shift almost all patio grime, with no danger to the surface or the joints.
Clear it completely
Furniture, planters, the grill, the doormat. Then sweep the whole patio before it gets wet, because soggy debris is much harder to move.
Choose your day
Mild, overcast or early morning. Cleaners dry too fast in full sun and leave patches, and in cold regions nothing should be done when a freeze is forecast that night.
Soak it first
Wetting the surface stops cleaner sinking straight into dry, porous stone and drying in blotches.
Work in sections
Around 25 to 50 square feet at a time, so nothing dries before you get back to it. Apply the cleaner and leave it for the dwell time on the label. The chemistry does most of the work, not your arms.
Scrub along the joints
Use a stiff deck brush or push broom, following the joint lines. Textured, cleft or stamped surfaces need the bristles to reach into every low spot.
Rinse well
Keep rinsing until the runoff is clear. Leftover cleaner attracts dirt and can leave a hazy film.
Look after the surroundings
Water the beds and lawn edge before and after so any runoff is diluted, keep products out of storm drains, ponds and creeks, and cover anything delicate.
Power washing: useful tool, common culprit
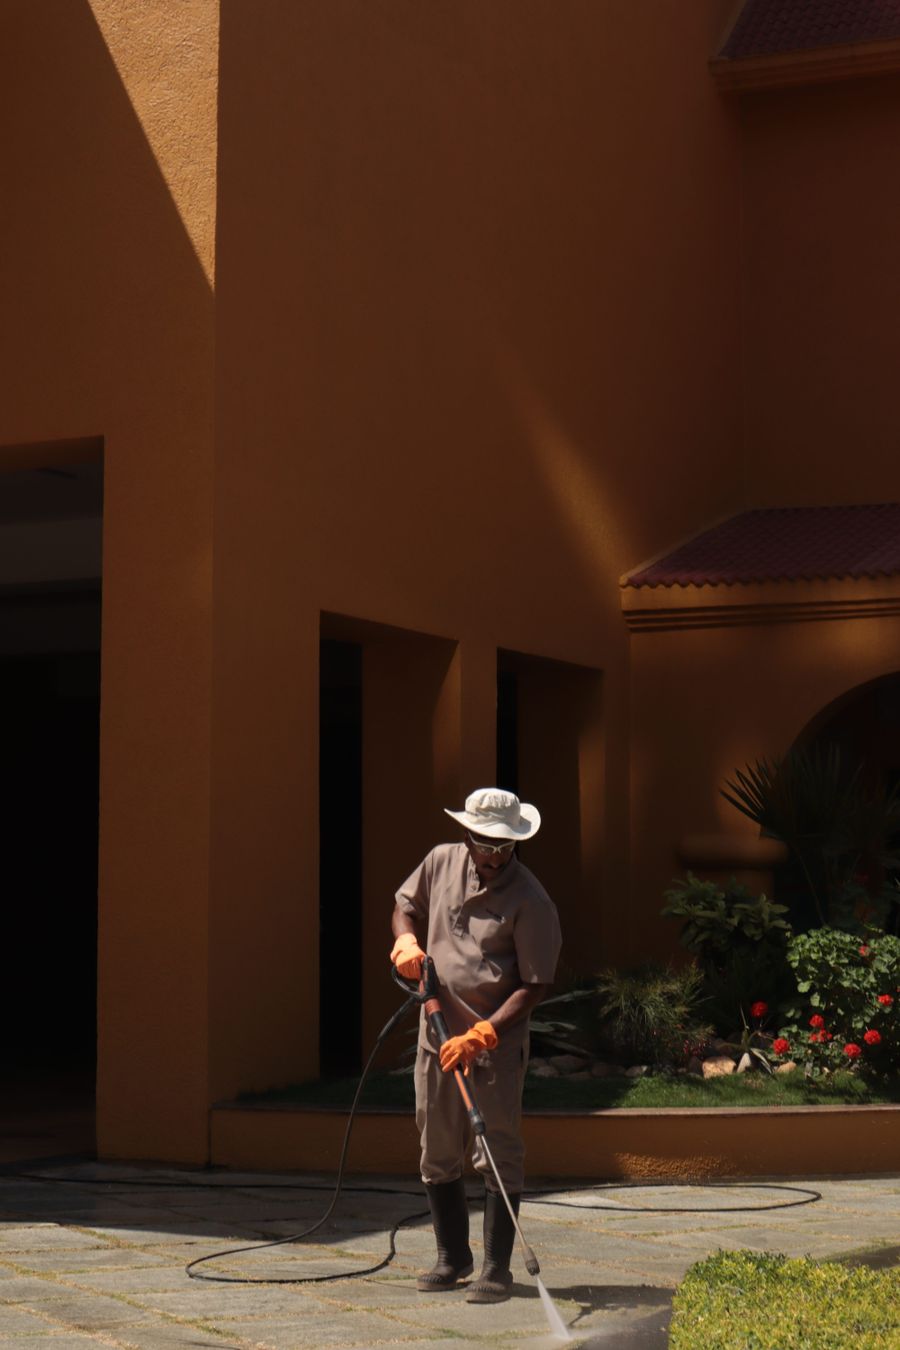
Used gently, a power washer saves a lot of scrubbing. Used hard, it is one of the most common reasons a patio looks worse after a few years rather than better.
✓Doing it the safe way
- Use the white (40°) or green (25°) tip - never the red zero-degree tip, and the yellow 15° only for stubborn spots on plain concrete
- Start around 1,200 to 1,500 PSI on pavers and only go up if the grime will not move. Plain concrete usually copes with more; soft stone with much less
- Hold the wand 12 inches or more from the surface, at a low angle rather than pointing straight down
- Keep it moving. Pausing in one spot is what etches the surface
- A rotary surface cleaner attachment gives an even finish and avoids stripes
- Spray across the joints, not along them, so the jet does not dig the sand out
- Plan to re-sand afterward on pavers and sand-jointed flagstone
!What goes wrong
- Joint sand blasted out. The most common damage, and it lets water and ants into the base
- Etched and pitted stone. Limestone, travertine and soft sandstone wear away under a close jet
- Stripes and swirl marks. Every pass of the wand shows for years on concrete
- Surface paste removed from concrete pavers, exposing the coarse aggregate and changing the color
- Sealer stripped unevenly on sealed or stamped concrete, so the whole patio needs redoing
- Dirtier, faster. A roughened surface gives algae and grime more to grip
- Never on limestone, travertine or soft stone beyond the gentlest setting
Test in a corner first. Wash a few square feet somewhere out of sight at your planned settings and look closely at it wet and again once dry. If the texture has changed or the joint has lost sand, back off the pressure, widen the tip or put the power washer away. Electric washers in the 1,500 to 2,000 PSI range are plenty for most home patios.
Cleaning kit
Amazon picksAs an Amazon Associate, PlantMapper may earn from qualifying purchases. Prices and availability are set by Amazon. Pick products made for your surface, try them on a hidden spot, follow the label for dilution and dwell time, and keep runoff away from plants, storm drains and waterways.
Patio cleaners and what each one is for
With the right cleaner, the broom and the power washer barely have to work.
| Type | Use it for | Watch out for | Suits |
|---|---|---|---|
| Concrete and paver cleaner | Everyday grime, light green film, dull surfaces | Give it the dwell time; scrubbing harder is no substitute | Most patios - read the label |
| Oxygen bleach (sodium percarbonate) | Algae, mildew and organic stains | Mix fresh; it loses strength once dissolved | Most pavers and stone; gentler on plants than chlorine bleach |
| Algae, mold and mildew treatment | Green and black growth | Some are left for days and rinsed by rain | Most surfaces; keep it off lawn and beds |
| Degreaser | Grill grease, cooking oil, car drips | Strong alkaline types can lighten some stone; test first | Concrete, pavers, porcelain, most flagstone |
| Acidic cleaner / mortar and haze remover | Mortar smears, cement haze, some efflorescence | Dissolves calcium-based stone; burns skin and plants | Never on limestone or travertine; test carefully elsewhere |
| Efflorescence cleaner | White powdery bloom that has not weathered away | Usually acidic, so the same cautions apply | Check the specific product |
| Rust remover for masonry | Orange marks from furniture feet, fertilizer granules and irrigation water | Often acidic; will not remove iron that is naturally in the stone | Check the specific product |
| Penetrating sealer | Making porous surfaces resist stains | Only on clean, completely dry, fully cured surfaces | Stone, concrete, pavers - pointless on porcelain |
| Chlorine bleach | Often recommended online, rarely a good idea | Blotches color, kills grass and plants, and leaves the cause untouched | Best kept off the patio |
Four rules for any patio chemical
- Try it somewhere hidden first, then judge the result once it is completely dry.
- Wet the area around it before you start, so the product cannot soak into dry stone where you did not want it.
- Protect your plants. Water beds and lawn edges before and after, cover what you can, and never let concentrate run into a storm drain, pond or creek.
- Do exactly what the label says on dilution, dwell time, temperature and rinsing. Stronger is not better, only more damaging.
Getting rid of algae
Algae is why so many patios look tired, and why they get slick after rain. It thrives in the humid Southeast and Gulf Coast in summer and in the Pacific Northwest through the long wet season, but any shady, damp patio will grow it. It is easy to clear and easy to discourage.
Know what it needs
Moisture, shade and a thin layer of organic grime. Algae is not a sign of cheap pavers; it is a sign of a surface that rarely dries out.
Sweep first
Take away the grime it lives in. On a lightly affected patio, that alone makes a visible difference.
Treat it and wait
An algae and mildew treatment or an oxygen bleach cleaner kills the growth rather than smearing it around. Some products work over days rather than minutes, so read the label.
Scrub and rinse
Once the treatment has worked, brush off the residue and rinse. A few products are meant to be left for rain to wash off instead.
Dry the patio out
This is what stops it coming back: fix any spot where water sits, clear drains and gutters that spill onto the patio, thin overhanging branches to let in sun and air, and keep leaves off in fall.
Start where people slip
Steps, ramps, pool decks and the path to the back door matter more than the middle of the patio. Treat those first and check them again before the wet season.
Clearing moss
- Scrape it out first. A crack weeder, an old screwdriver or a stiff wire brush clears the bulk faster than any spray.
- Then treat what is left with a moss and algae product labeled for patios, following the directions.
- Look at the joint underneath. Moss growing happily in a joint usually means the joint sand has washed low. Refilling it is the real fix - see below.
- Do not dig out sound joint material while you are at it. Keep the tool angled along the joint rather than prying down into it.
- Change the conditions. Moss needs constant damp: shade from trees or the house, poor slope, overhanging shrubs and still air are the causes worth tackling.
- Expect some back in deep shade. A north-facing patio under big trees in Oregon or Washington will always grow a little moss. Aim to control it, not to win outright.
Pulling weeds and keeping them out
Weeds in a patio rarely push up from the soil below the base. They sprout from seed that lands in the dirt collecting in half-empty joints, which is why sweeping beats spraying.
Pulling them out
- A crack weeder or paver knife hooks out roots and debris together
- A wire weed brush clears long runs of joint quickly
- Get the root - snapping off the top just buys a few weeks
Boiling water
- Poured straight from the kettle onto joint weeds, it kills the top and often the root
- Best on small annual weeds; deep-rooted perennials like dandelion often regrow
- Be careful carrying it outside, and keep it off plants you want to keep
Weed killers
- Pick a product labeled for patios, walkways and driveways
- Follow the label exactly and keep it out of storm drains and waterways
- Think about pollinators, pets and kids who use the yard before you spray
The lasting fix
- Refill low joints so seed has nowhere to lodge
- Sweep often so dirt and leaf litter never build up
- Polymeric sand resists weeds and ants far better than plain sand
Joint care and re-sanding with polymeric sand
On a paver patio the joint sand locks the units together and keeps water, weeds and ants out of the gravel base. A yearly look along the joints is the best twenty minutes you can spend on it.
Inspect every spring
Walk the patio after the snow melts or the wet season ends. Joints sitting well below the paver edges, sand washed into the lawn, moss or weeds in the gaps and anything that moves underfoot are all worth noting.
Fix movement first
Filling joints around a paver that rocks or has sunk will fail within a season. Lift it, correct the base and bedding sand, and reset it before you touch the joints - see rocking pavers.
Clear out the old material
Rake or blow out loose sand, moss and debris. If you are switching to polymeric sand, remove enough to give the depth the bag asks for, often around 1 inch or more. Do not chip the paver edges.
Let it dry completely
Polymeric sand must go into dry joints on a dry surface. After washing, that can mean waiting a day or two of warm, dry weather.
Choose the filler
Polymeric sand for most paver and dry-laid flagstone patios: it hardens, resists washout and discourages weeds and ants. Plain joint sand is cheaper and easier to top up but washes out faster. Flagstone set in a mortar bed needs mortar joints instead.
Check the forecast
Most polymeric sands want temperatures above roughly 40 to 50°F and no rain for about 24 hours after you wet them in. Ignoring that is the commonest reason the joints stay soft or crumble.
Fill, compact and fill again
Sweep sand in, run a plate compactor with a protective pad over the pavers (or tamp by hand on small areas), then top up to just below the paver bevel or about 1/8 inch below the top.
Clean off, then mist
Blow every grain of sand off the paver surface before you water it in, or it will set as a hard haze. Then mist gently in stages as the label directs.
Flagstone in mortar is a different job. Cracked or loose mortar joints on a flagstone patio set in concrete should be chiseled out to sound material and repointed with fresh mortar in mild weather. If a whole stone sounds hollow when tapped, it has lost its bond and needs lifting and resetting rather than just new joints.
Should you seal your patio?
For most pavers and stone, sealing is a choice rather than a must. Stamped and colored concrete is the main exception. Either way, sealing does not replace cleaning, and once you start you are signing up to reseal every few years.
✓Worth doing when
- It is stamped or colored concrete, where a sealer protects the color and the pattern and is normally renewed every two to three years
- The surface is porous - flagstone, bluestone, limestone, travertine or plain concrete
- Stains really bother you, especially under the dining table or beside the grill
- You have just re-sanded pavers and want a joint-stabilizing sealer to help hold the sand
- You like a richer color. A wet-look sealer deepens pavers and slate; a matte one barely shows
!Hold off when
- It is porcelain. There is nothing for a sealer to soak into, so it sits on top, goes patchy and can turn slippery
- White efflorescence is still appearing. You would trap it under the sealer, often for good
- The surface is damp. Trapped moisture turns sealer cloudy and milky
- It is dirty. Sealer locks the grime in permanently
- The concrete is new. Many sealers ask you to wait about 28 days for poured concrete to cure; check the label
- You have not thought about grip. Glossy film sealers get slick when wet, especially around pools; many brands sell an anti-slip additive
The main types of sealer
- Penetrating sealers (silane, siloxane and similar) soak in and line the pores. The look barely changes, the surface can still breathe, and they are the usual pick for stone and plain concrete.
- Wet-look or color-enhancing sealers deepen the tone so the patio looks freshly rained on. Striking on pavers and slate, but try it on a spare paver first.
- Film-forming acrylic sealers sit on top with a satin or gloss sheen. They are the standard choice for stamped concrete, but they wear in traffic lanes and can blush white if moisture gets trapped.
- Joint-stabilizing paver sealers soak into the joint sand and bind it, which helps against washout and weeds.
- Nothing lasts forever. Expect to reseal every two to five years depending on the product, the sun and the foot traffic. Strong sun in the Southwest wears sealers faster.
- The water test. Splash some water on. If it beads up, the sealer is still working; if it soaks in and darkens the surface, it is time to reseal.
- Let new pavers settle first. Wait until any efflorescence has stopped and the surface has been cleaned, which is often a few months after installation rather than a few days.
Sealing and joint products
Amazon picksAs an Amazon Associate, PlantMapper may earn from qualifying purchases. Prices and availability are set by Amazon. Sealing is optional on most pavers and stone and should never go on porcelain. The surface must be clean, completely dry and fully cured. Test on a spare paver or a hidden corner first, because sealers change the look and can make a surface slicker when wet.
Removing stains
Speed matters more than the product. A spill cleaned up in the first few minutes usually vanishes; the same spill found next spring may never fully come out.
| Stain | Right away | Next | Notes |
|---|---|---|---|
| Red wine, juice, popsicles | Blot, do not rub, and flood it with water | Paver cleaner or oxygen bleach; a poultice if it has set | Porcelain barely notices; pale limestone is the worst case |
| Grill grease and cooking oil | Cover with cat litter or another dry absorbent, leave for hours, then sweep up | Degreaser made for concrete and pavers | Old grease in porous stone may never fully lift |
| Leaf and tannin stains | Get the leaves off and wash the area | Oxygen bleach cleaner or an organic stain remover | Prevention is sweeping in fall; oak and walnut leaves are the worst |
| Algae and moss shadows | Brush off the growth | Algae treatment left for its full dwell time | The shadow usually fades over a few weeks |
| Rust from furniture or fertilizer | Move the item and pad the feet; sweep up stray fertilizer granules | Rust remover made for masonry, tested first | Never acid on limestone or travertine |
| Irrigation water stains | Adjust sprinkler heads that hit the patio | Rust or mineral stain remover suited to the surface | Common with well water high in iron |
| Mortar or concrete splatter | Wipe off while it is still wet if at all possible | Mortar or haze remover, used exactly as directed | Usually acidic. Wet the area around it first |
| Paint | Lift as much as you can before it cures | A masonry-safe paint stripper, tested out of sight | Solvents can leave a dark ring on porous stone |
| Chewing gum | Freeze it with ice and pop it off | Clean up the residue with a suitable cleaner | Do not gouge soft stone |
| Bird droppings and berry stains | Remove promptly and rinse | General cleaner if a mark is left | Droppings are mildly acidic and can etch limestone |
How a poultice works. For a stain that has soaked into porous stone or concrete, mix an absorbent powder (diatomaceous earth, talc or even flour) with the right solvent or cleaner into a paste about as thick as peanut butter. Spread it over the stain, cover it with plastic, and let it dry for a day or two. As it dries it pulls the stain up out of the stone. It is slow and may need repeating, but it beats scrubbing harder every time.
That white powder is efflorescence. New pavers and concrete often show a white haze in their first year as natural salts work up to the surface. It is harmless and usually fades by itself with rain and sweeping. Brush it off dry and be patient; use an efflorescence cleaner only if it is still there after several months, and never seal over it.
Furniture, planters and everyday marks
- Put glides or pads on metal legs. Steel and wrought iron rust where they touch the patio, and the orange mark soaks into concrete and stone.
- Raise planters on pot feet. A pot sitting flat on the patio leaves a permanently wet ring that grows algae and stains.
- Move things around now and then. Anything that never moves leaves a lighter or darker patch, because the patio around it weathers and the covered spot does not.
- Lift furniture rather than dragging it. Dragged legs chip paver edges and scratch smooth surfaces.
- Give the grill a mat. Grease spatters farther than you think. A grill mat under a gas grill or smoker saves a lot of degreasing.
- Mind fire pits. Intense heat can crack or discolor pavers and spall concrete. Use a fire pit with a raised base or a heat shield, and follow the maker's clearance advice.
- Watch fertilizer and tools. Granules bounced onto the patio from a lawn spreader and tools left out over winter both leave rust marks that outlast them.
Fall patio maintenance
What you do in fall decides what the patio looks like when spring comes around.
- Keep the leaves off. Wet leaves left all winter are the main cause of tannin staining and hand moss and algae the organic layer they need.
- Clear every drain grate, trench drain, catch basin and gutter outlet. Leaf fall is the number one reason patio drainage stops working, and blocked drains in a freeze mean ice.
- Wash the patio once the leaves are mostly down and before the first hard freeze, so it goes into winter clean.
- Check the joints along the shady and low edges, where trouble starts.
- Treat algae now rather than waiting for spring. Getting ahead of it before the wet months keeps the surface safer underfoot.
- Store or cover furniture so metal feet are not sitting on wet pavers for months.
- Finish sealing and re-sanding early. In cold regions most products need several mild, dry days, which disappear fast after mid-fall.
- Mark the edges with snow stakes if you use a snowblower or a plow service, so nobody gouges the edging or the lawn.
Winter care: shovels, salt and freeze-thaw
Across the northern half of the country, winter does more damage to a patio than the rest of the year combined. Water gets into pores and cracks, freezes, expands and repeats, dozens of times a season in places that swing above and below 32°F. De-icing salts make that cycle worse.
De-icers and your patio
Rock salt (sodium chloride) is cheap and works down to roughly 15 to 20°F, but it speeds up surface scaling on concrete and soft stone, corrodes metal, and the runoff burns lawns and plants. Calcium chloride and magnesium chloride melt at much lower temperatures but are still salts.
- Shovel first, melt second. Clearing snow before it is packed into ice is far kinder to the patio than melting ice later.
- No de-icer on new concrete. Keep all de-icers off poured concrete, and preferably new pavers, for their first winter, roughly the first year.
- Never use ammonium-based melters (ammonium nitrate or ammonium sulfate). They attack concrete directly.
- Gentler choices: calcium magnesium acetate (CMA) is much kinder to concrete and plants, though it costs more and works best above about 20°F. Look for melters labeled safe for concrete and pavers.
- Sand for grip. Coarse sand gives traction without any chemical damage; sweep it up in spring so it does not end up in the drains.
- Use the least that works, spread thinly, and sweep up leftover pellets once the ice is gone.
- Use a plastic shovel blade or one with a plastic or rubber wear strip. A bare steel edge scrapes stone and porcelain and chips paver edges.
- Raise the snowblower. Set the skid shoes so the scraper bar rides just above the pavers, or it will catch raised edges and pull out joint sand.
- Do not pile plowed or shoveled snow on the patio or against the house. Big piles melt slowly, refreeze nightly and push meltwater toward the foundation.
- Do not clean, re-sand or seal in freezing weather. Polymeric sand, mortar and sealers all have minimum temperatures, and water left on the surface in a freeze does damage.
- Watch the shady spots. The north side of the house can stay icy for days after the rest has melted; sand that route rather than treating the whole patio.
- Expect some green over winter in the Pacific Northwest and other mild, wet areas. It is not permanent harm; deal with it when the weather allows.
- Look for frost heave in spring. Pavers lifted by frost often settle back, but any that stay high or rock once the ground has thawed should be reset on a firm base.
Care by patio material
Each surface wants slightly different handling. Pick yours.
Porcelain pavers
The lowest-maintenance patio surface you can buy, and the one people most often overdo.
- Routine: sweep, then wash with water, a soft or medium brush and a little dish soap. That handles nearly everything.
- Never seal. Porcelain absorbs almost nothing, so sealer just sits on top, goes patchy and can make it slick.
- Power washing does the tile no harm, but the joints can suffer, so keep the wand back and off the joint lines.
- Stains rarely get in. Most come off with a household cleaner and a brush.
- Watch for a dull film of pollen and grime, especially on dark colors in spring; regular rinsing keeps the finish crisp.
- Chips show the body color and cannot be hidden, so protect it when moving heavy planters or a grill.
Flagstone and bluestone (sandstone)
Hard-wearing but porous, so quick action on spills matters most.
- Routine: sweep often and wash in spring and fall with water, a stiff brush and a stone or paver cleaner if needed.
- Power washing only with care: wide tip, low pressure, wand well back. Softer sandstones pit, and sand-filled joints empty quickly.
- Sealing is optional. Worth it under a dining table or on pale stone; use a penetrating sealer on clean, dry stone.
- Algae is common in shade, especially in humid or rainy regions. Treat it each year and fix drainage where it keeps coming back.
- Rusty spots are natural iron in some flagstone, not a defect, and usually cannot be removed.
- Mortared flagstone needs its joints checked each spring; freeze-thaw opens cracks that let water under the stones.
- Avoid strong acids, which can damage the stone's surface and the minerals that bind it.
Limestone and travertine
The fussiest surfaces here. Lovely, especially around pools in the Sun Belt, and genuinely sensitive.
- No acidic cleaners, ever. Both are calcium-based, and acid dissolves them, leaving permanent dull etch marks. That rules out many mortar, rust and efflorescence removers.
- Routine: sweep and wash with water and a pH-neutral cleaner made for natural stone.
- Power washing only at the gentlest setting, if at all. It visibly wears the surface.
- Sealing is more worthwhile here than on any other stone, especially around outdoor kitchens and dining areas.
- Watch for etching from wine, lemonade, citrus, vinegar, some pool chemicals and bird droppings. Rinse spills right away.
- Travertine holes open up over time on unfilled tiles; that is normal, and they can be filled if you prefer a smoother surface.
Poured, stamped and broom-finished concrete
Simple to keep clean, with three things to watch: efflorescence early on, sealer on stamped work and salt damage in cold regions.
- Routine: sweep and wash; a concrete cleaner or oxygen bleach takes care of most grime.
- Stamped and colored concrete is normally sealed with an acrylic sealer and resealed every two to three years, or when it starts to look faded and chalky.
- Efflorescence is common in the first year. Brush it off dry and let rain wear it away rather than attacking it with acid.
- Power washing can etch the surface and leave stripes. Use a surface cleaner and moderate pressure.
- Hairline cracks are normal in slabs. Seal cracks wider than about 1/8 inch with a concrete crack sealant so water cannot get in and freeze.
- Salt is hard on concrete, causing flaking called scaling. Keep de-icers off it for the first winter and use them sparingly after that.
Slate
Easy in principle, but a dark surface shows every speck.
- Routine: sweep and rinse. Slate shows dust, pollen and hard-water spots clearly, so it needs rinsing more often than pale stone.
- Flaking in the first year or two is normal on some slate as loose layers shed. Brush them off; it calms down.
- Sealing is optional. A wet-look sealer keeps the deep color most people choose slate for.
- Power washing at moderate pressure only; a close jet can lift layers.
- Watch for white mineral spots if you rinse with hard water and let it dry in hot sun.
- Avoid acidic cleaners, and test anything new somewhere hidden.
Granite
Nearly indestructible. The joints need more attention than the stone does.
- Routine: sweep and wash. Granite is dense enough to resist most stains on its own.
- Sealing is rarely needed on flamed or thermal-finish granite.
- Power washing does not hurt the stone, but cobbles have a lot of joints, and those are what suffer.
- Cobblestones collect moss and grit in their joints; a wire brush and a yearly clear-out is the main job.
- Watch for joint material washing out between cobbles, which is where problems begin.
Concrete pavers and clay brick
The surface is easy. Looking after the joints is most of the job.
- Routine: sweep often, because dirt in the joints is where weeds, moss and ants start.
- Top up joint sand as it washes low, ideally with polymeric sand, swept in on a completely dry day and compacted.
- Power washing empties the joints. If you do it, expect to re-sand afterward, and keep the wand well back.
- Sealing is optional; a joint-stabilizing sealer helps lock the sand in and can deepen and protect the color, but it has to be renewed.
- Check the edge restraint. If pavers start drifting outward, the edging has failed and needs fixing before the field loosens.
- Single pavers lift out and replace easily, which makes stains, frost heave and damage much less of a worry than on a poured slab.
Long-term care
- Keep some spares. A few pavers or stones from the original order, stored in the garage, are worth a lot in ten years when one cracks and that color has been discontinued.
- Refill joints before they fail completely. Topping up a few low joints is a morning; re-sanding the whole patio is a full weekend and a compactor rental.
- Let natural stone age. Mellowing and slight color change are weathering, not damage. A twenty-year-old bluestone patio should not look brand new.
- Watch the edges and the drainage. That is where problems start and where they are cheapest to fix.
- Rethink the planting. Shrubs and trees that were small when the patio went in may now keep half of it in permanent shade and leaf litter.
- Check any sealer every couple of years with the water-bead test and reseal before it has worn off completely.
- Mind the roots. Trees planted close to a patio can lift pavers and crack slabs over time. Give new trees plenty of room.
The patio maintenance checklist
Tick things off as you go - it remembers where you got to. The seasons below fit most of the country; adjust them for your climate using the table after the checklist.
Spring
Summer
Fall
Winter
| Region | Best time to wash and re-sand | Best time to seal | Main thing to watch |
|---|---|---|---|
| Northeast & Midwest (zones 3-6) | Late spring once the ground has thawed, and early fall | Late spring to early fall, on dry days above about 50°F | Freeze-thaw, frost heave and salt from shoveling |
| Mid-Atlantic & transition zone (zones 6-7) | Spring and fall | Spring or fall, avoiding the hottest weeks | Repeated freeze-thaw, plus algae in humid summers |
| Southeast & Gulf Coast (zones 8-10) | Fall through spring, outside the heat and storm season | Fall or spring on a dry spell | Algae, mildew and pine pollen; heavy downpours washing out joints |
| Southwest & California (zones 7-11) | Cooler months; early mornings in summer | Fall through spring, never in afternoon heat | Sun fading color and wearing out sealer; hard-water spots |
| Pacific Northwest (zones 6-9) | Late spring and late summer | Summer, the only reliably dry stretch | Moss and algae through the long wet season |
| Mountain West & Plains (zones 3-6) | Late spring and early fall | Summer, on calm days | Deep frost, wild temperature swings, wind-blown grit |


Patio maintenance: frequently asked questions
How do you clean a patio without damaging it?
Sweep it, soak it with the hose, put down a cleaner made for your surface and leave it for the time printed on the label, then scrub along the joints with a stiff push broom and rinse until the water runs clear. That handles nearly all patio dirt without any risk to the surface. Do one section at a time so nothing dries halfway, skip hot afternoon sun and freezing days, and try any new product on a hidden spot first.
What PSI should I use to power wash pavers?
Start low, at roughly 1,200 to 1,500 PSI, with a 25 or 40 degree tip held 12 inches or more from the surface, and only go up if the dirt will not move. Most concrete pavers and broom-finished concrete are fine somewhere under about 2,500 PSI. Soft stone such as limestone or travertine wants the gentlest setting or no power washer at all. A rotary surface cleaner attachment gives a far more even result than a wand, and you should plan to re-sand paver joints afterward.
Should I seal my pavers?
It is optional, not essential. Sealing concrete pavers can deepen the color, slow fading and help lock joint sand in place, and many people do it after re-sanding. Stamped and colored concrete is a different case: it is normally sealed and resealed every two to three years to protect the color. Porcelain should never be sealed. Only seal a surface that is clean, completely dry and no longer showing white efflorescence, and expect to redo it every few years.
How often should I clean my patio?
Sweep or blow it off every couple of weeks, give it a proper wash in spring and again in fall, and do a deeper clean every few years if it has gone dull. A shady patio in the humid Southeast or the rainy Pacific Northwest will probably need an algae treatment every year, while a sunny porcelain patio in Arizona may need little more than a sweep and a hose-down. Little and often beats ignoring it for years and then blasting it.
How do I get rid of moss between pavers?
Scrape the bulk out of the joints with a crack weeder or wire brush, then treat what is left with a moss and algae product labeled for hard surfaces, keeping it off nearby beds and lawn. After that, go after the reason it grew: moss needs a surface that stays damp and shaded, so improving the slope, clearing drains, thinning overhanging branches and keeping leaves off in fall is what stops it returning. Moss rooted in a joint is also a sign the joint sand has washed low and needs topping up.
What kills algae on a patio?
A cleaner sold for algae, mold and mildew on concrete and stone, put down on a swept surface and given the dwell time on the label. Some work in minutes and some are meant to be left for days and let rain do the rinsing. Killing it works better than scrubbing it off. Straight household bleach is not a good choice: it can blotch colored pavers, burns lawn edges and plants, and does nothing about the damp that let algae in.
How do I stop weeds growing between pavers?
Keep the joints full and keep them swept. Most weeds in a patio sprout from seed landing in dirt and debris that settles into half-empty joints, not from the soil underneath, so a full, firm joint leaves them nowhere to start. Pull what is there with a crack weeder or kill it with boiling water, rake out the old joint sand, refill with polymeric sand, and sweep a few times a season so organic matter never builds up.
Can I use bleach on my patio?
It is best avoided. Bleach can lighten colored pavers and stamped concrete unevenly, the runoff scorches grass and flower beds, and it does nothing to fix the damp, shady conditions that grow algae. An oxygen bleach (sodium percarbonate) cleaner or a product made for outdoor concrete and stone does the job better and is far kinder to the plants beside the patio.
What is the easiest patio material to maintain?
Porcelain pavers, by a wide margin. They do not soak up spills, never need sealing, hold their color and resist algae much better than porous stone, so a sweep and a rinse is basically the whole routine. Granite is close behind. The most work is limestone and travertine, which are etched by acids, and pale flagstone in deep shade, which will want cleaning every year and may be worth sealing.
How do I get grease or oil stains off a concrete patio?
Move fast. Pile cat litter or another dry absorbent on the spill, let it soak up the oil for several hours, then sweep it away rather than wiping, which smears it. Follow with a degreaser made for concrete and pavers. For a stain that has already set, a poultice of absorbent powder and degreaser left to dry over the mark pulls it back out and may need a second round. Old grease in porous stone sometimes never fully disappears.
How often do pavers need re-sanding?
Whenever the joints have dropped noticeably below the paver edges, usually every few years and always after a heavy power washing. Rake out loose material, let the pavers dry completely, sweep in polymeric sand to just below the bevel, compact or tamp it, blow the surface clean and mist it to activate it with no rain expected for about a day. Full joints lock the pavers together and keep weeds and ants out. If pavers are drifting outward, fix the edge restraint first.
Is rock salt safe on a patio?
Use it sparingly, if at all. Rock salt (sodium chloride) makes freeze-thaw damage worse on concrete and soft stone, rusts metal furniture and edging, and the runoff browns lawns and hurts plants. Never use any de-icer on concrete less than a year old, and avoid products containing ammonium nitrate or ammonium sulfate, which attack concrete. Shovel early, spread sand for grip, and if you need a melter choose calcium magnesium acetate or one labeled safe for concrete and pavers.
Why does my patio turn green?
Because it stays damp for long stretches. Shade, moisture, warmth and a film of organic grime are exactly what algae wants, which is why patios turn green through a humid Southern summer or a long, wet Northwest winter. Cleaning takes the green off; drying the surface keeps it off. Fix any spot where water sits, keep drains clear, thin trees and shrubs so sun and air reach the patio, and keep leaves swept off in fall.
How long does a patio last?
A well-built paver or flagstone patio can easily last 25 years or more, and good concrete pavers on a proper base often far longer, because individual units can be lifted and replaced. A poured concrete slab commonly lasts decades too, although some cracking is normal. What cuts a patio's life short is rarely the surface: it is a thin or poorly compacted gravel base, frost heave, or water with nowhere to go. Maintenance keeps a good patio looking good; it cannot save a badly built one.
Can I clean a patio in winter?
Sweeping and clearing snow, yes. Wet cleaning, sealing and polymeric sand are another story in cold regions: most products need temperatures above about 40 to 50°F, and water left on the surface overnight can freeze into a hazard. In the North, spring and fall are the windows. In zones 9 and 10, where winters are mild and dry, the cooler months are actually the best time to wash and seal, away from the summer heat.
Why does my sealed patio look cloudy or white?
Usually moisture was trapped under the sealer: it went on before the pavers or concrete were fully dry, rain hit it too soon, or it was put on too thick. Sealing over efflorescence or leftover cleaner gives the same milky look. Film-forming acrylic sealers can also wear patchily where people walk most. Some sealers can be revived with a solvent from the same maker, while others must be stripped, so check with the sealer's manufacturer before trying anything.
Notes and limitations
Test before you treat
Pavers and stone vary a lot, even within one material. Always try a cleaner, sealer or treatment on a spare piece or a hidden corner, and judge the result once it is completely dry.
Acids and calcium-based stone
Limestone, travertine and marble are dissolved by acid. Many mortar, rust and efflorescence removers are acidic and must not be used on them.
The label comes first
Dilution, dwell time, temperature limits, surface condition and rinsing are all specific to each product. The manufacturer's directions override any general advice here, and for pesticides the label is the law.
Protect the yard and waterways
Water nearby plants before and after treating a patio, cover what you can, and never let concentrated product into a storm drain, pond or creek. Storm drains usually lead straight to local streams without treatment.
Power washers
Power washing can permanently change a surface and strip joints and sealer. For sealed, stamped, valuable or soft-stone patios, gentler methods are safer.
Affiliate links
Some links on this page are Amazon affiliate links. PlantMapper may earn a commission from qualifying purchases at no extra cost to you. It never affects which products we suggest. See our affiliate disclosure.